Painted candlesticks are one of the easiest and most aesthetic ways to elevate your home decor. Whether you’re styling a cozy dinner table, decorating a mantel, planning a wedding tablescape, or refreshing thrifted finds, painted candlesticks add charm, color, and personality instantly. Pinterest is filled with beautifully styled taper candles in soft pastels, moody earth tones, modern abstract patterns, and vintage-inspired finishes — and the best part is that they’re surprisingly simple to create.
This DIY project works with taper candles, pillar candles, or wooden candlestick holders. You can use acrylic paint for decorative candles (not intended for burning fully) or specialized candle-safe paint for functional designs. For candlestick holders, chalk paint and spray paint offer durable and professional-looking finishes.
Before painting, always wipe the surface clean and ensure it’s completely dry. For candles, avoid painting too close to the wick if you plan to burn them. For wooden or metal holders, light sanding improves paint adhesion.
In this guide, you’ll find 10 detailed painted candlestick ideas with step-by-step instructions and materials lists. These ideas range from minimalist and modern to bold and artistic — perfect for Pinterest boards and stylish home decor.
Let’s explore creative ways to transform simple candlesticks into statement pieces.
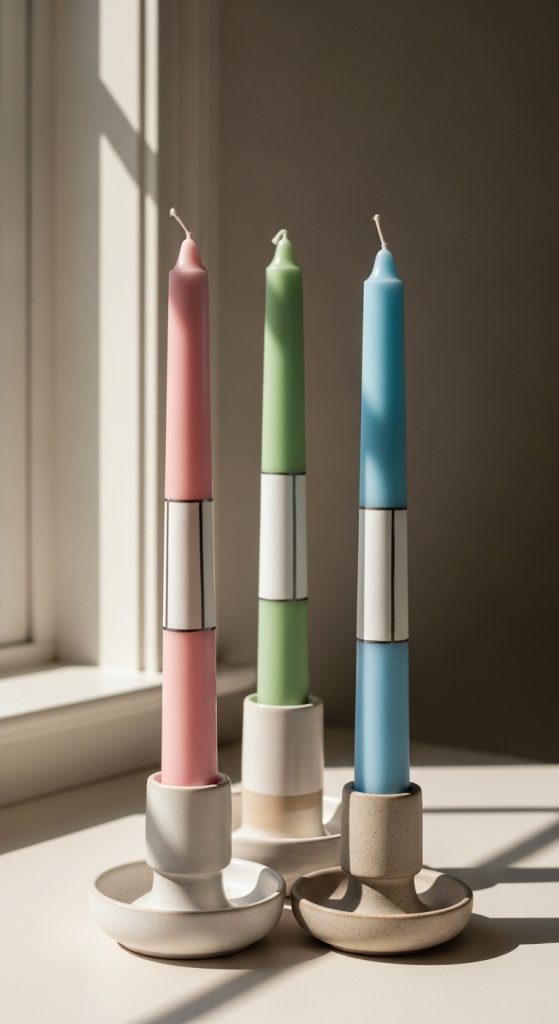
1. Pastel Color Block Candlesticks
Soft pastel color blocking creates a playful yet elegant look. This design works beautifully on taper candles or wooden holders.
What Defines This Look
- Two to three pastel shades
- Clean, taped-off sections
- Matte or satin finish
- Modern aesthetic
Step-by-Step How-To
- Clean and dry candlestick surface.
- Use painter’s tape to divide sections.
- Paint each section with a different pastel color.
- Let dry completely before removing tape.
- Seal with clear matte sealer (for holders).
Materials Needed
- Acrylic or chalk paint
- Painter’s tape
- Flat paintbrush
- Clear sealer (optional)
Modern and Pinterest-ready.
2. Vintage Distressed Candlestick Holders
Give old candlestick holders a shabby chic makeover with distressed paint.
What Defines This Look
- Neutral base color (white, cream, sage)
- Light sanding for worn effect
- Vintage farmhouse vibe
Step-by-Step How-To
- Apply base coat of chalk paint.
- Let dry completely.
- Lightly sand edges and raised areas.
- Apply clear wax or sealer.
Materials Needed
- Chalk paint
- Sandpaper
- Clear wax
Timeless and cozy.

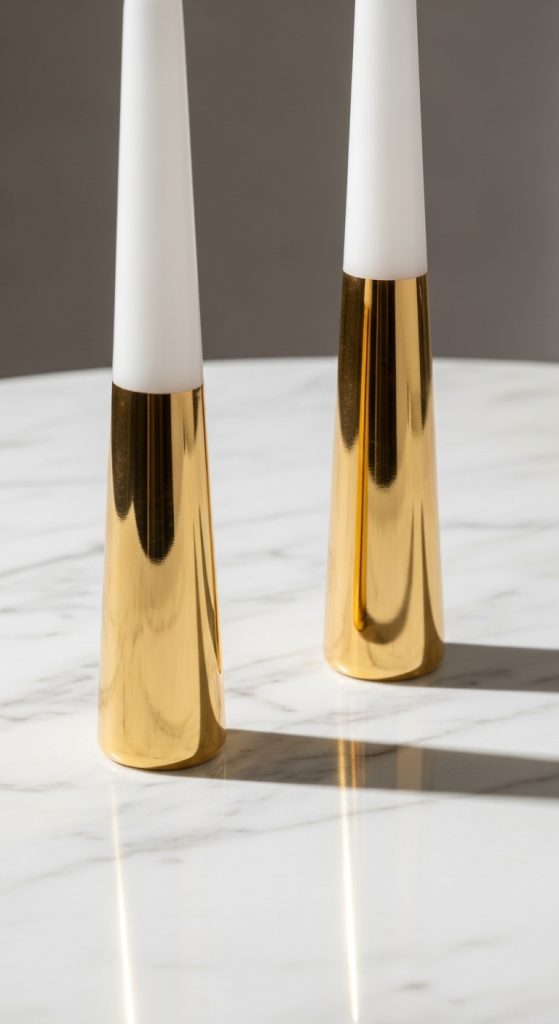
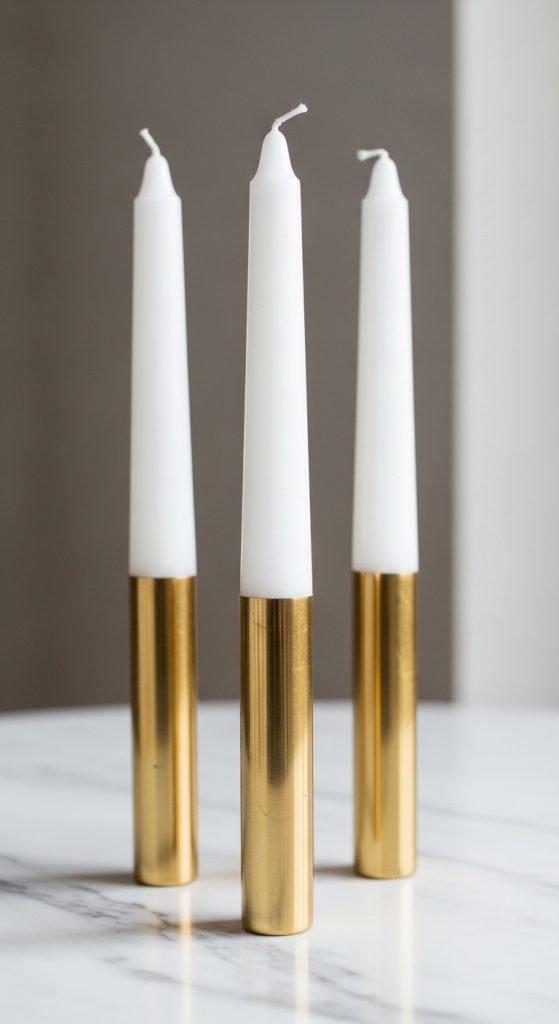
3. Gold-Dipped Taper Candles
Minimal yet luxurious, this design features metallic gold at the base of taper candles.
What Defines This Look
- Solid candle color
- Metallic gold-dipped base
- Glossy metallic finish
Step-by-Step How-To
- Tape off lower third of candle.
- Paint bottom section with gold paint.
- Allow to dry fully.
- Remove tape carefully.
Materials Needed
- Metallic gold paint
- Painter’s tape
- Small flat brush
Elegant and modern.
4. Floral Hand-Painted Candlesticks
Delicate floral details wrap around the candle or holder for a romantic touch.
What Defines This Look
- Small flowers and leaves
- Soft pastel palette
- Glossy finish
Step-by-Step How-To
- Paint base color.
- Add small floral details using fine brush.
- Let dry thoroughly.
- Seal if painting holders.
Materials Needed
- Acrylic paint
- Fine detail brushes
- Sealer (for holders)
Soft and charming.
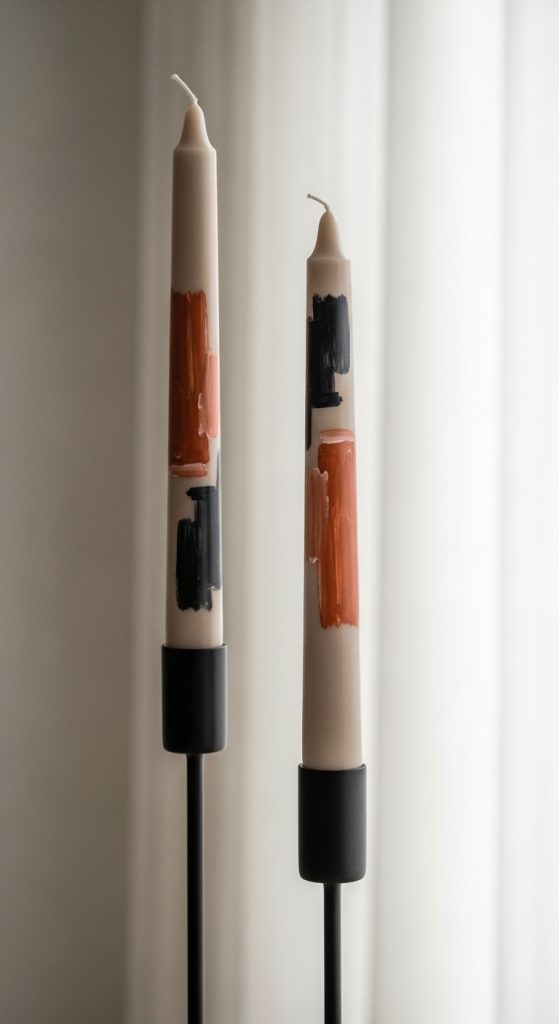
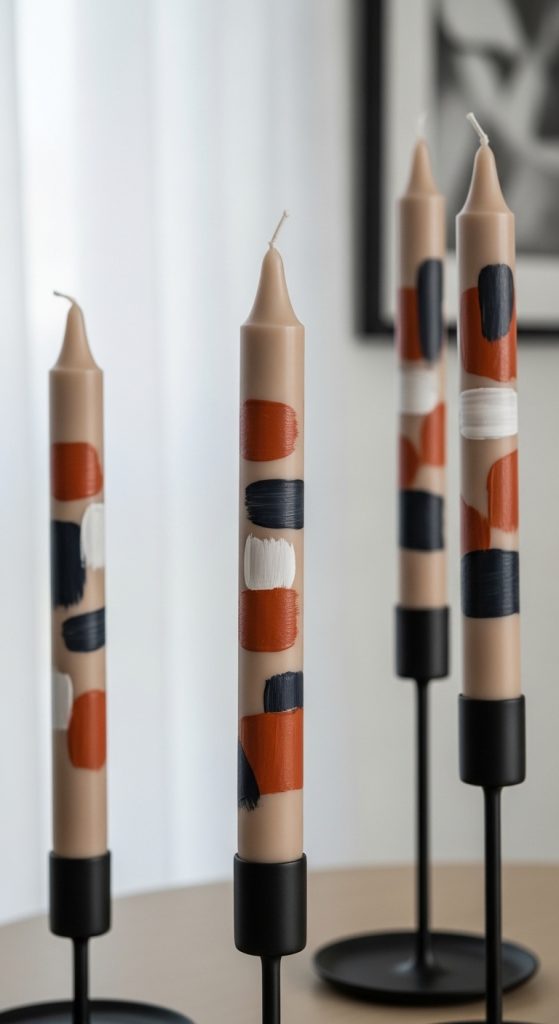
5. Abstract Brushstroke Candles
Loose, artistic brushstrokes create a bold modern look.
What Defines This Look
- Visible brush strokes
- Neutral or bold color mix
- Contemporary design
Step-by-Step How-To
- Start with neutral candle base.
- Use flat brush to add random strokes.
- Blend slightly while wet.
- Let dry fully.
Materials Needed
- Acrylic paints
- Flat brush
Creative and trendy.
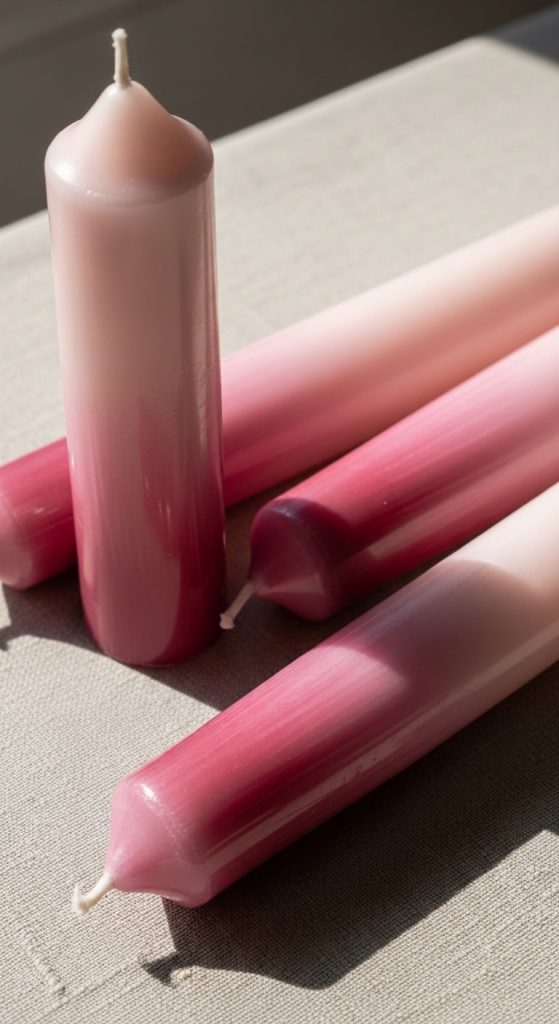
6. Ombre Gradient Candles
Blend two shades into a smooth gradient for a soft elegant look.
What Defines This Look
- Two-tone gradient
- Smooth color transition
- Matte finish
Step-by-Step How-To
- Paint lighter shade as base.
- Blend darker shade toward bottom with sponge.
- Smooth transition gently.
- Let dry.
Materials Needed
- Two paint shades
- Makeup sponge
Dreamy and aesthetic.
7. Black & White Minimalist Candlesticks
Monochrome painted stripes or dots give a bold, graphic look.
What Defines This Look
- Black and white palette
- Clean stripes or dots
- High contrast finish
Step-by-Step How-To
- Paint base white.
- Use fine brush for black lines or dots.
- Let dry completely.
Materials Needed
- Black and white paint
- Fine brush
Chic and modern.
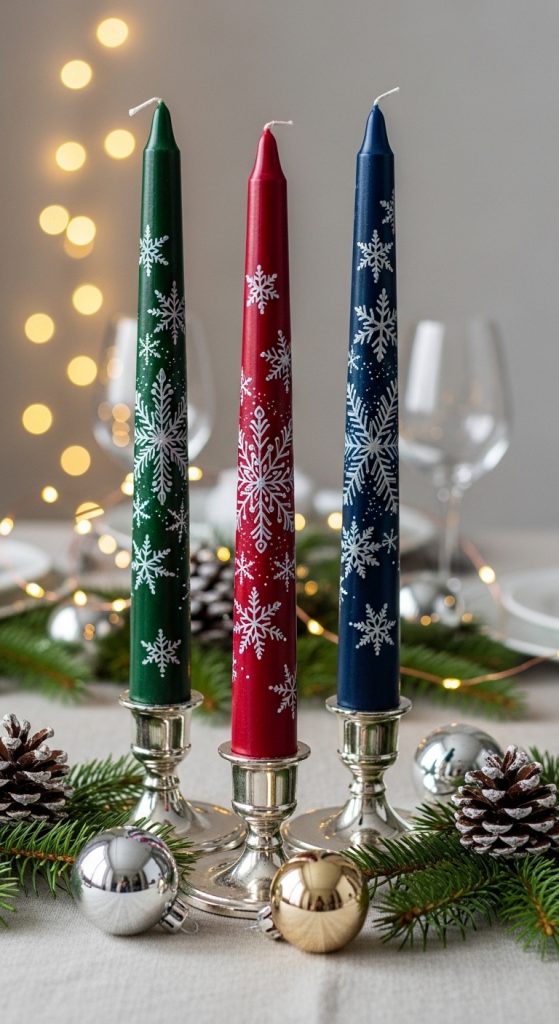
8. Holiday-Themed Painted Candles
Customize for seasons — snowflakes for winter, pumpkins for fall, hearts for Valentine’s Day.
What Defines This Look
- Seasonal symbols
- Coordinated color palette
- Festive vibe
Step-by-Step How-To
- Paint solid base.
- Add small themed designs.
- Let dry fully.
Materials Needed
- Acrylic paints
- Detail brush
Perfect for seasonal decor.
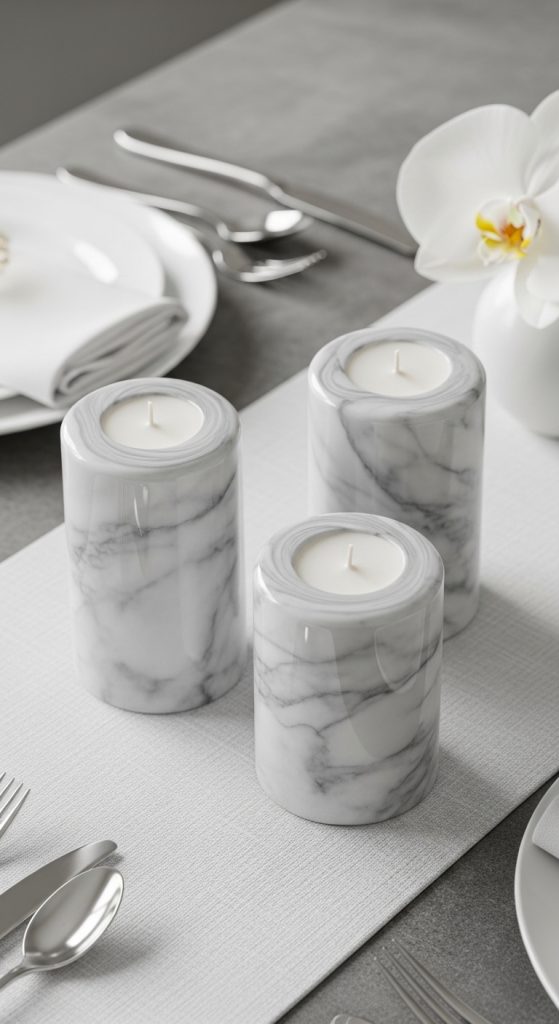
9. Marble Effect Candlesticks
Create a faux marble effect using swirling technique.
What Defines This Look
- White base
- Gray swirl lines
- Glossy finish
Step-by-Step How-To
- Paint white base.
- Add thin gray swirl lines.
- Blend gently with dry brush.
- Let dry and seal (for holders).
Materials Needed
- White and gray paint
- Fine brush
Elegant and high-end look.
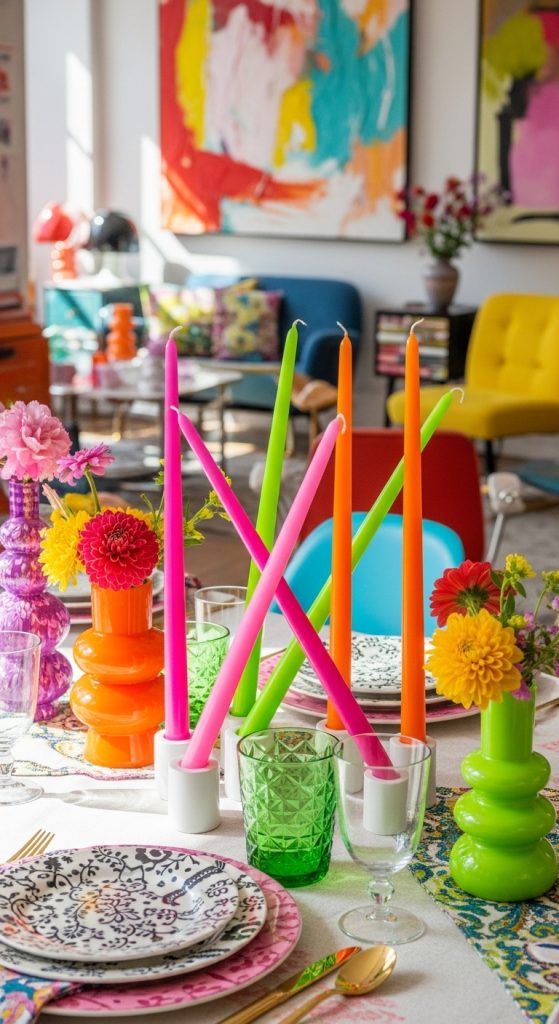
10. Bold Neon Painted Candles
Bright neon colors create a statement centerpiece.
What Defines This Look
- Neon pink, green, or orange
- Solid high-impact finish
- Glossy look
Step-by-Step How-To
- Apply white base coat (for brightness).
- Add neon paint in thin layers.
- Let dry fully.
Materials Needed
- White base paint
- Neon paint
- Flat brush